

Everything you need for work, home and learning
Over 180 Stores
Click & Collect
Top Brands
Print & Copying
DHL Service Point
Western Union


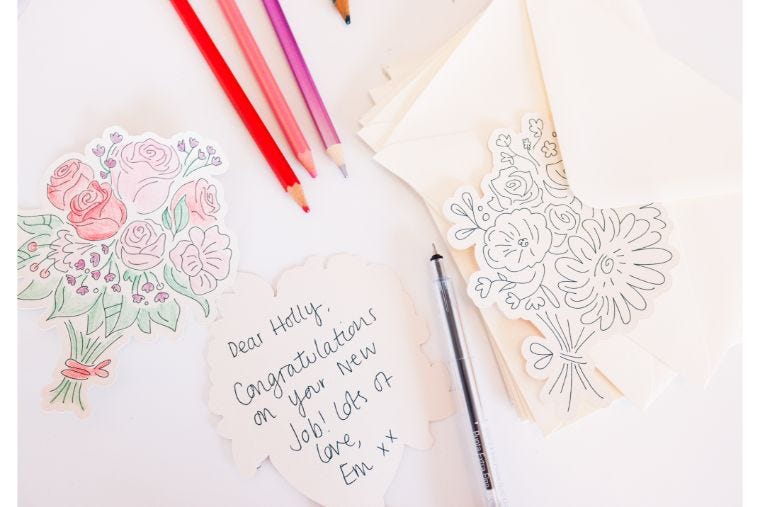
Create beautiful happy mail notecards, that are perfect for all occasions be it celebrations or condolences these bouquet notecards are the perfect postal pick me up.
Create beautiful happy mail notecards, that are perfect for all occasions be it celebrations or condolences these bouquet notecards are the perfect postal pick me up.
Use the draw then cut function on your Cricut machine to draw a gorgeous bouquet design that either you or the recipient can colour in!

You will need:
-Plain card
-Cricut pen
-Cricut Joy, Cricut Explore Air 2 or Cricut Maker
-Cricut lightgrip mat
-Colouring pencils
-Envelopes
Step One:
Open up a new project in Cricut Design Space, search in the image library for ‘Bouquet, draw’ and choose a selection of the bouquet designs and add them to the canvas. Check in the layers panel that you have chosen draw then cut designs.
Resize each bouquet to around 3x4 inches, or size to fit your envelopes.
Next, load card onto your mat, then load a pen into your machine. For the Cricut Explore and Cricut Maker load the pen into port A, push the pen down until the grey arrow on the pen disappears and clicks into place then close up the clamp. For Cricut Joy, switch out the blade and load pen into port, then close the clamp.

Step Two:
Load the mat into the machine and choose the card setting for the type of card that you are using, your machine will draw then cut out the notecard.
Once cut, carefully remove the cards from the mat, to prevent the card from curling turn the mat over and peel the mat away from the card.

Step Three:
Colour in the bouquet notecards with colouring pencils or leave blank for the recipient to colour in!

Step Four:
Add your message to the back of the notecard, then pop into an envelope, perfect happy mail!
